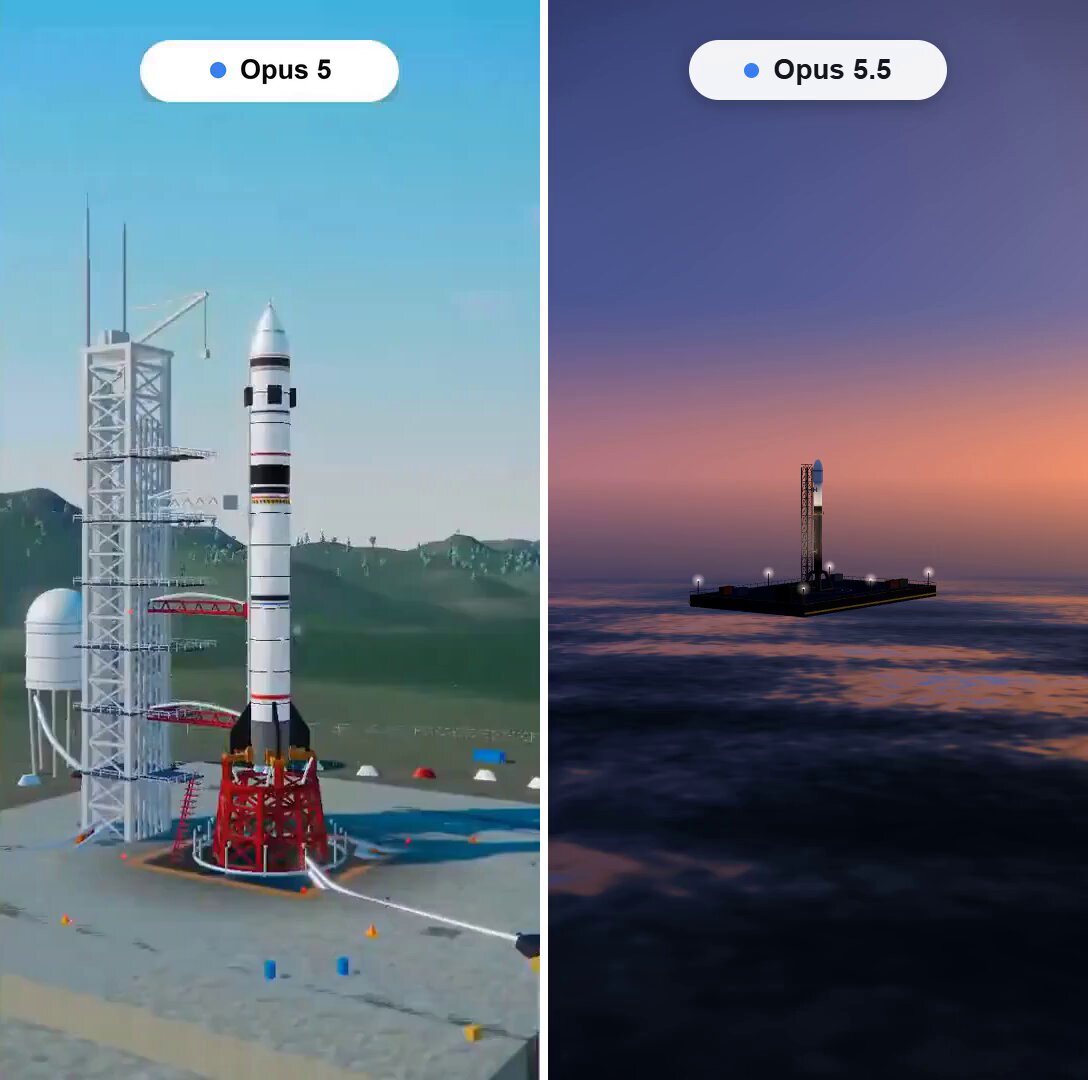
Artless101 shared this prompt in an author comment for the Opus 5.5 version of an interactive Three.js/WebGL rocket-launch project. It requests a procedural ocean-platform launch, a staged flight through satellite deployment, cinematic camera transitions, and playback/scrubbing controls in a single HTML file.
A starting brief based on the creator's public project, not a verbatim original prompt. Your result will vary.
Claude Opus 5.5Three.jsWebGLinteractive 3Drocket launchocean platformspaceflightprocedural geometry
The prompt
Create a cinematic, highly detailed, interactive 3D rocket launch from an ocean platform at dawn. Deliver the complete project in one HTML file that opens directly in Chrome. Use Three.js + WebGL and procedural assets. Embed assets wherever practical; a reliable CDN may be used for the rendering library.
ART DIRECTION
Create a dramatic transition from a dark, blue-violet ocean before sunrise to warm sunlight above the atmosphere. Use convincing proportions, detailed materials, atmospheric depth, and carefully composed camera angles. The result should feel like a polished miniature spaceflight film.
ROCKET AND LAUNCH PLATFORM
Build a convincing multistage rocket with a shaped nose cone, panel seams, structural rings, interstage connections, engine nozzles, and a payload fairing that separates into two halves.
Create a detailed floating launch platform with a support tower, retracting strongback, service arms, railings, ladders, pipes, equipment, floodlights, and blinking warning beacons. Keep all structures physically connected and correctly positioned.
LAUNCH SEQUENCE
Create an approximately 46-second sequence:
Establishing camera move around the platform.
Service arms and strongback retract.
Engines ignite, illuminating the rocket, platform, and nearby water.
Smoke spreads across the deck as the rocket lifts off and accelerates.
The camera follows the climb from the atmosphere toward space.
The first stage separates and falls away.
The second-stage engine ignites.
The fairing halves separate, revealing a satellite.
The engine shuts down, the satellite deploys, and its solar panels unfold.
Finish with an orbital view of the satellite against Earth’s curved horizon and sunrise.
Compress the flight timeline for presentation while maintaining coherent motion. Avoid sudden position changes, intersecting components, or disconnected effects.
OCEAN, ATMOSPHERE, AND EFFECTS
Use animated shader-driven ocean waves with Fresnel reflections and warm engine-light reflections. Create layered exhaust with a bright core, softer outer flame, and drifting smoke particles.
Smoke should expand, fade, and respond to wind. Exhaust must remain attached to the correct engine through staging. Transition smoothly from atmospheric haze to a dark star field and Earth’s illuminated limb.
CAMERA AND INTERACTION
Use smooth cinematic camera transitions: wide establishing view, low-angle ignition shot, ascent tracking, stage separation, and satellite close-up. Keep the main subject visible in both portrait and landscape layouts.
Include play/pause, replay, and a scrubber with event markers. Seeking must reconstruct the correct rocket configuration, particle state, camera position, and lighting. Replaying must reset the entire sequence cleanly.
Keep the interface minimal and unobtrusive. Allow it to be hidden for recording.
TECHNICAL QUALITY
Use frame-rate-independent animation and efficient particle systems. Reuse geometry and materials where appropriate, handle resizing correctly, and balance visual detail with smooth performance.
Test the final HTML in a desktop browser. Inspect the console and capture screenshots at ignition, liftoff, staging, and satellite deployment. Fix loading errors, clipping, geometry problems, broken seeking, and poor camera framing before delivering the file.
How to use this prompt
01
Start with the right workspace
Open your preferred coding assistant or 3D tool. Use the model shown on the example as a starting point, and check any linked project for setup instructions.
02
Choose one thing to change
Swap the subject, art style or setting. Keep the camera and interaction clear. Build a small version first, then refine one detail at a time.
03
Give the scene its own assets
For a custom character or prop, create a 3D model from a short object description or reference image, then bring it into your project.
Previews belong to their respective creators. Check the original source and project license before reusing code or assets.