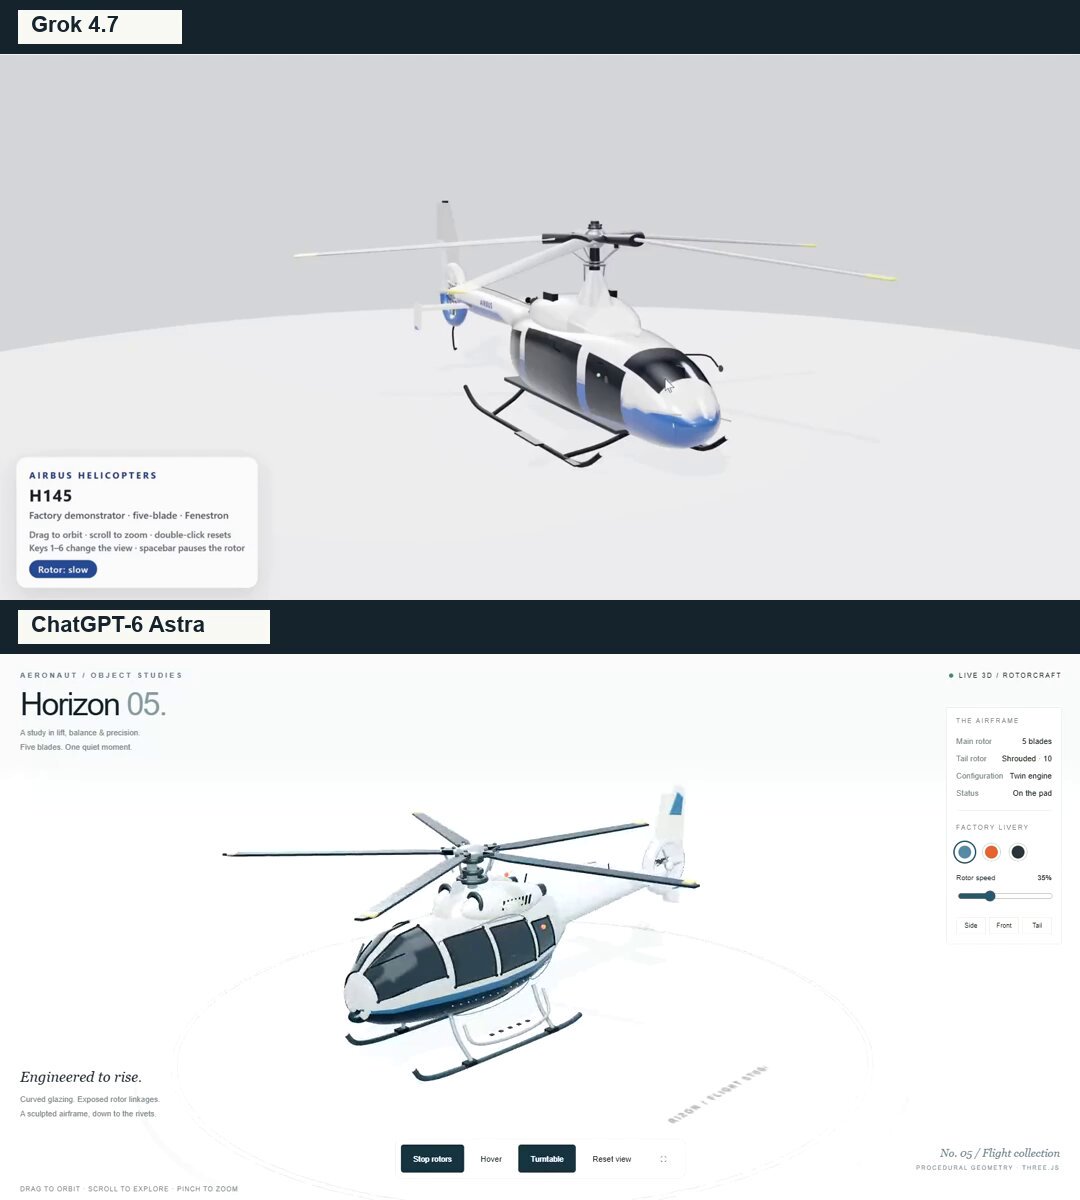
The author shared this prompt in a comment on their comparison of Grok 4.7 and ChatGPT-6 Astra. It requests a browser-based interactive 3D helicopter presentation with procedural geometry, detailed aviation features, selectable liveries, rotor controls, hover behavior, camera controls, and a responsive Three.js/WebGL interface.
A starting brief based on the creator's public project, not a verbatim original prompt. Your result will vary.
3D helicopterThree.jsWebGLinteractive 3Dprocedural geometryaviation designhelicopter visualizerPBR materials
The prompt
Create a detailed, interactive 3D scene of a modern helicopter in a single HTML file using Three.js and WebGL. Build genuine 3D geometry that can be viewed from every angle, not an image.
Visual style:
A premium aviation design presentation with a light gray studio background, a circular display platform, soft shadows, and realistic reflections.
Helicopter:
A smooth, streamlined fuselage inspired by light twin-engine helicopters such as the H145.
A white body with a dark navy underside and blue accent stripe.
Curved, tinted cockpit windows with reflections and carefully fitted window seals.
Side doors, handles, panel seams, rivets, boarding steps, and antennas.
Two engine housings with air intakes, ventilation grilles, and exhaust outlets.
A five-bladed main rotor with a detailed hub, attachment hardware, and pitch-control linkages.
A tapered tail boom, stabilizers, and a shrouded tail rotor with a genuine opening through its housing.
Curved landing skids attached to the fuselage with structural supports.
Navigation lights and a blinking beacon.
All components must connect physically. Avoid floating parts, gaps between sections, rotor blades intersecting the fuselage, or windows hovering above the body.
Interactions:
Mouse drag to orbit, scroll to zoom, and touch controls.
Start and stop both rotors with gradual acceleration and deceleration.
Adjustable rotor speed.
Hover mode: smoothly lift off the platform, gently sway in the air, and land softly when disabled.
Automatic camera orbit.
Front, side, and tail camera presets.
Reset camera and fullscreen controls.
Three liveries: glacier blue and white, rescue orange, and graphite.
Interface:
Top left: a small “AERONAUT / OBJECT STUDIES” label and a large “Horizon 05.” heading.
Right side: a compact panel with specifications, helicopter status, livery selection, and rotor speed.
Bottom: controls and interaction hints.
Restrained typography, thin borders, and generous whitespace. Keep the helicopter unobstructed.
All interface text in English.
Technical requirements:
Generate the geometry procedurally without downloading a prebuilt helicopter model.
Use PBR materials, a studio reflection environment, and soft shadows.
Make animation independent of frame rate.
Reuse geometry and materials where appropriate, and cap pixel ratio for performance.
Support desktop and mobile layouts, keeping the full rotor span visible in the initial view.
If possible, embed dependencies in the HTML so the file works offline.
Display a helpful fallback message if WebGL is unavailable.
Before finishing, inspect the model from every side, test every control, and check for console errors. Pay particular attention to the silhouette, structural connections, glazing, and rotor mechanisms.
Deliver the working HTML file, not just an explanation.
How to use this prompt
01
Start with the right workspace
Open your preferred coding assistant or 3D tool. Use the model shown on the example as a starting point, and check any linked project for setup instructions.
02
Choose one thing to change
Swap the subject, art style or setting. Keep the camera and interaction clear. Build a small version first, then refine one detail at a time.
03
Give the scene its own assets
For a custom character or prop, create a 3D model from a short object description or reference image, then bring it into your project.
Previews belong to their respective creators. Check the original source and project license before reusing code or assets.